My writer productivity skyrockets when I set monthly writer goals, and it’s time to share…
Manuscript Format the Easy Way
Manuscript Format the Easy Way
After many years of writing manuscripts using Microsoft Word, I’ve found tricks on how to manuscript format the easy way, and I’m passing these tips to you. I’m always looking for ways to simplify my life and save time.
Simplify life? Save time?
Who doesn’t want that?
I’m assuming you know the basics about standard formatting settings (12 pt. font, Times New Roman, etc…), but if you don’t, I recommend “How to Format a Book: 10 Tips Your Editor Wants You to Know” by Blake Atwood at Writelife.com.
While there are a variety of methods to format your manuscript, today we’re focusing on simple. Think of this as the set-it-and-forget it strategy. To do this we simply modify the two Styles we use most often when writing a manuscript.
Manuscript Format the Easy Way
Note: Editors and agents expect to see proposals and manuscripts as Microsoft Word documents, and this tutorial is for formatting in Microsoft Word.
The best time to format your manuscript is before you start writing. (Don’t worry. If you’re midway through a project, simply do the following steps, and then manually change your chapter headings to the Heading 1 style. Your body text will automatically update with the new settings of the Normal style.)
- Open Microsoft Word and create a New, Blank document. Save it with an easily identifiable name for your manuscript. This doesn’t have to be a working title. It could be the genre, setting, series or whatever works for you. Ex: Jewel-River-Book-2.doc
- You should see a blank page with the Home tab and toolbar. We’re going to set Styles for the two basic types of text we’ll be using. The screenshot below shows the Styles section if you’re unsure where to find it.
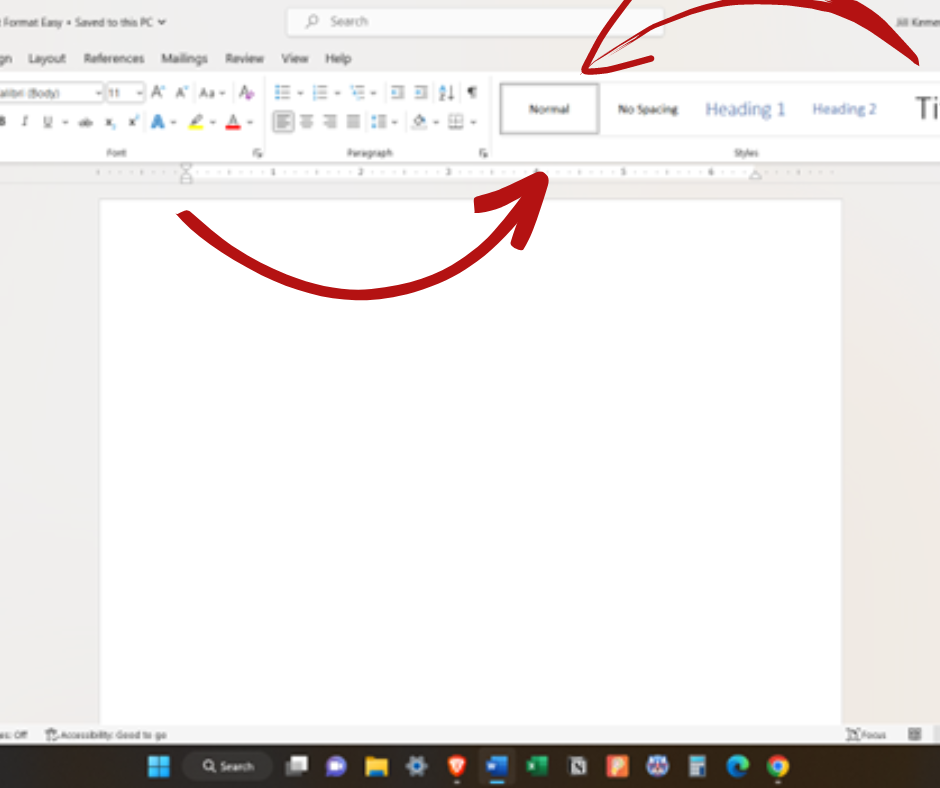
The two styles we’re focusing on are Normal and Heading 1. The Normal style will be the body of your text. This is the default style for text. Heading 1 will be for your chapter titles.
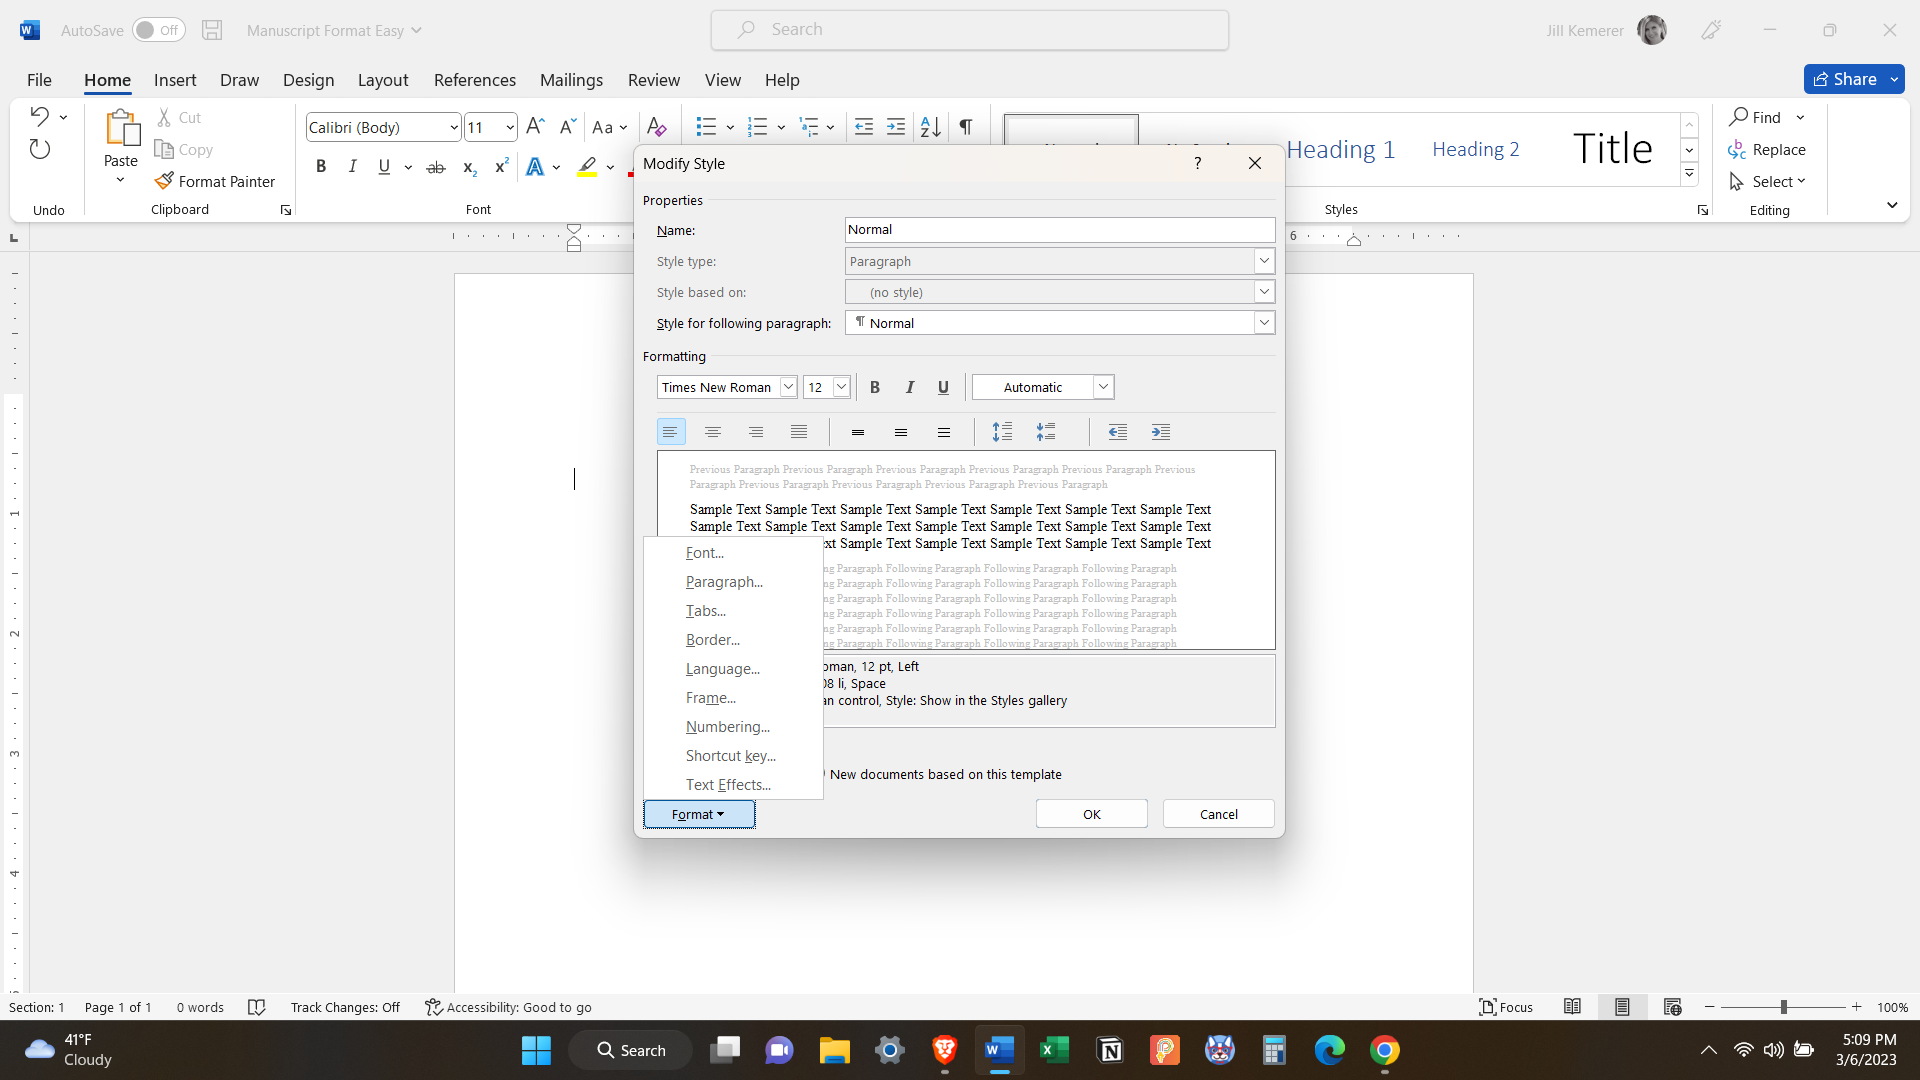
3. Select Normal from the Styles toolbar and right click it. Select Modify from the pop-out menu.
This is what your screen should look like.

4. In this new pop-up window, go to the Formatting section and click on the arrow next to Calibri (font), then scroll down until you find Times New Roman. Select it. Then click the arrow next to the 11 (font size) and change it to 12.
5. At the bottom left of the pop-up window, you’ll see a box with the word Format and an arrow next to it. Select the arrow. You’ll now see a list (Font, Paragraph, Tabs…).
6. Select Paragraph. A new pop-up window will appear. In the Indentation section, click on (none) under Special and select First Line. You should now see a 0.5 under By. Keep this. It means you’ve set each paragraph to automatically indent by half an inch every time you press Enter. This eliminates the need to use the Tab button.
5. Now go down to Spacing and change the After setting to 0 pt. This eliminates extra spacing between paragraphs. The Before setting should already be 0 pt. To the right of Spacing, you’ll see Line Spacing. Go ahead and click the arrow to select Double.
The correct settings should look like this:

Go ahead and click OK to exit that pop-up window and OK to exit the next one. Your Normal Style is now set. This is your body text.
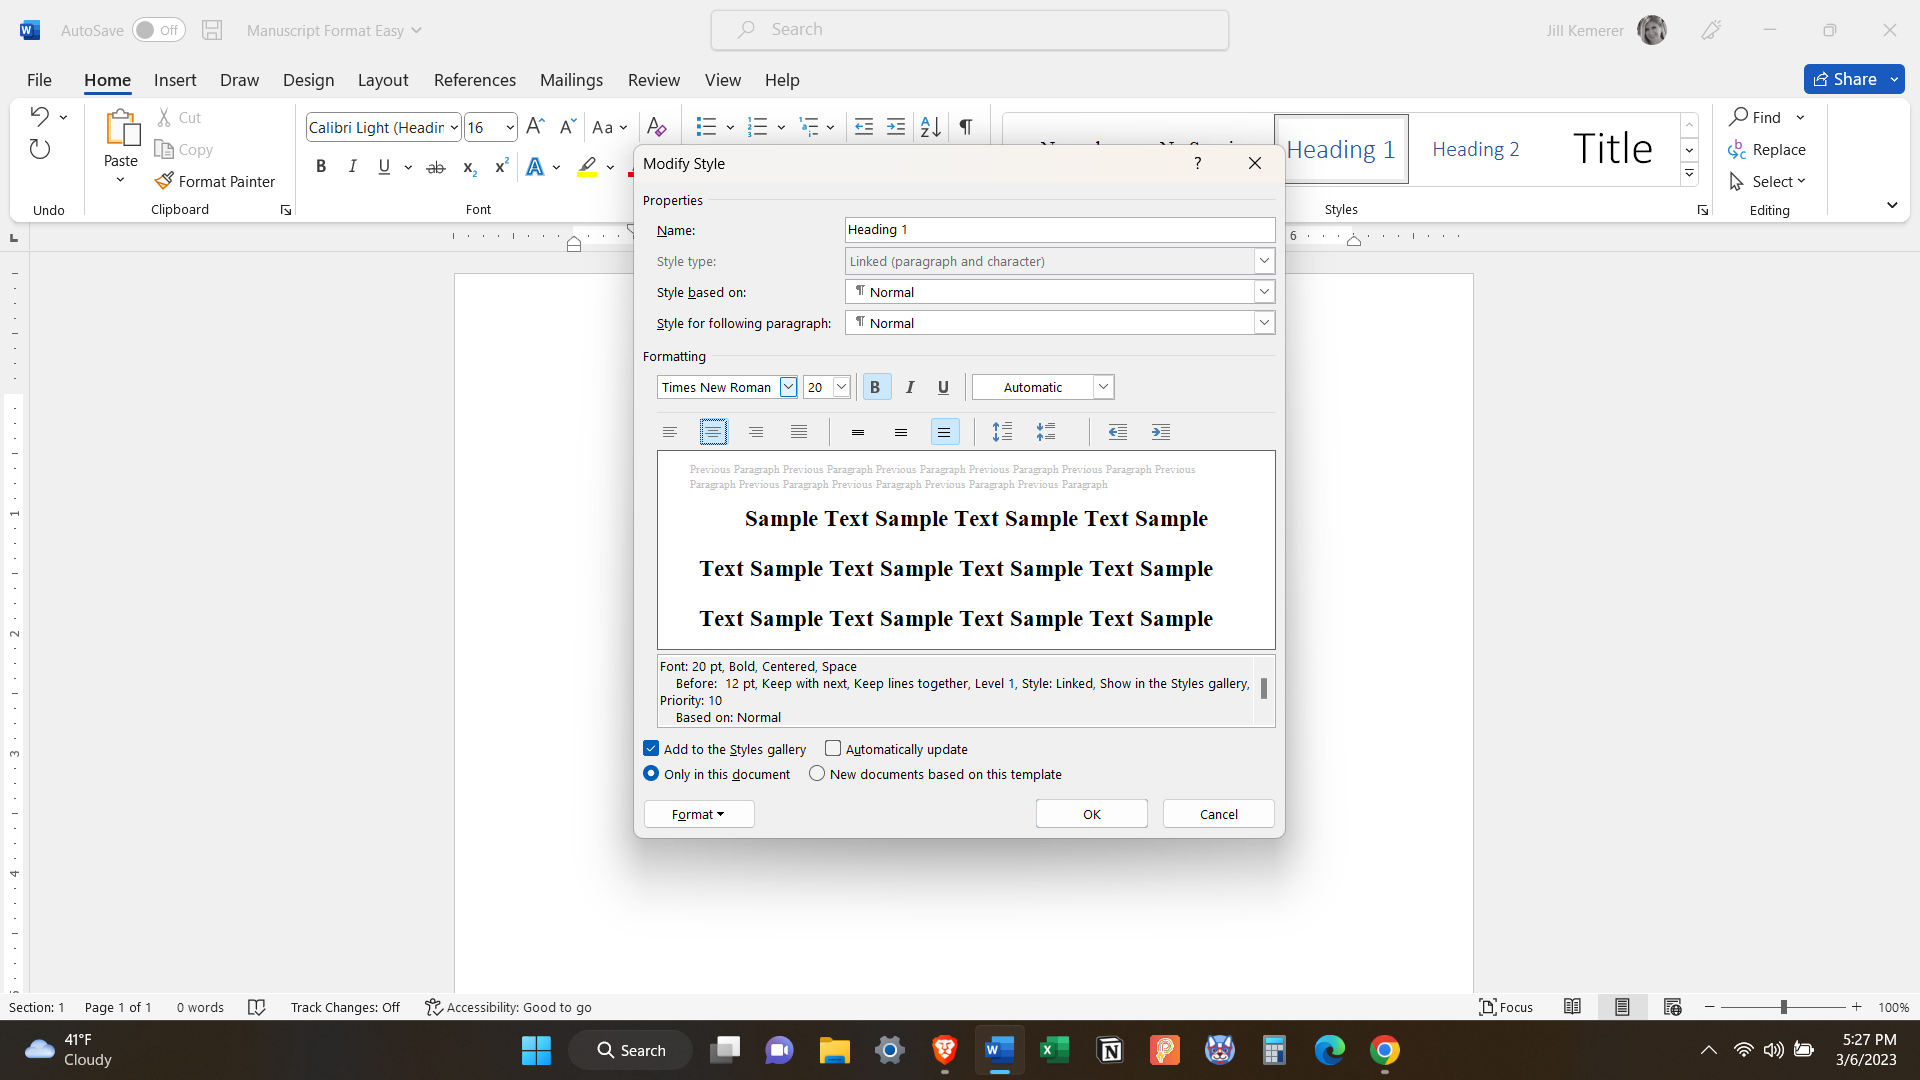
6. We’re going to repeat this process for the Heading 1 style, which will be used for chapter headings. In the Home tab toolbar, Select Heading 1 from the Style section. Right click to access the pop-out menu, and select Modify. Under Formatting, choose Times New Roman again. I change the font size to 20. Feel free to use a smaller or larger font size.
7. Next to the font and font size windows, you’ll see buttons for Bold, Italicize and Underline. Select Bold. To the right of these buttons, you’ll find a color option. The default color for Heading 1 is blue, but we want black, so click the arrow next to it and change the color to black. Directly below these settings, you’ll see bars to indicate Left, Center or Right justification. Select the Center justification. This will ensure your chapter headings are centered.
Your pop-up window should look like this:
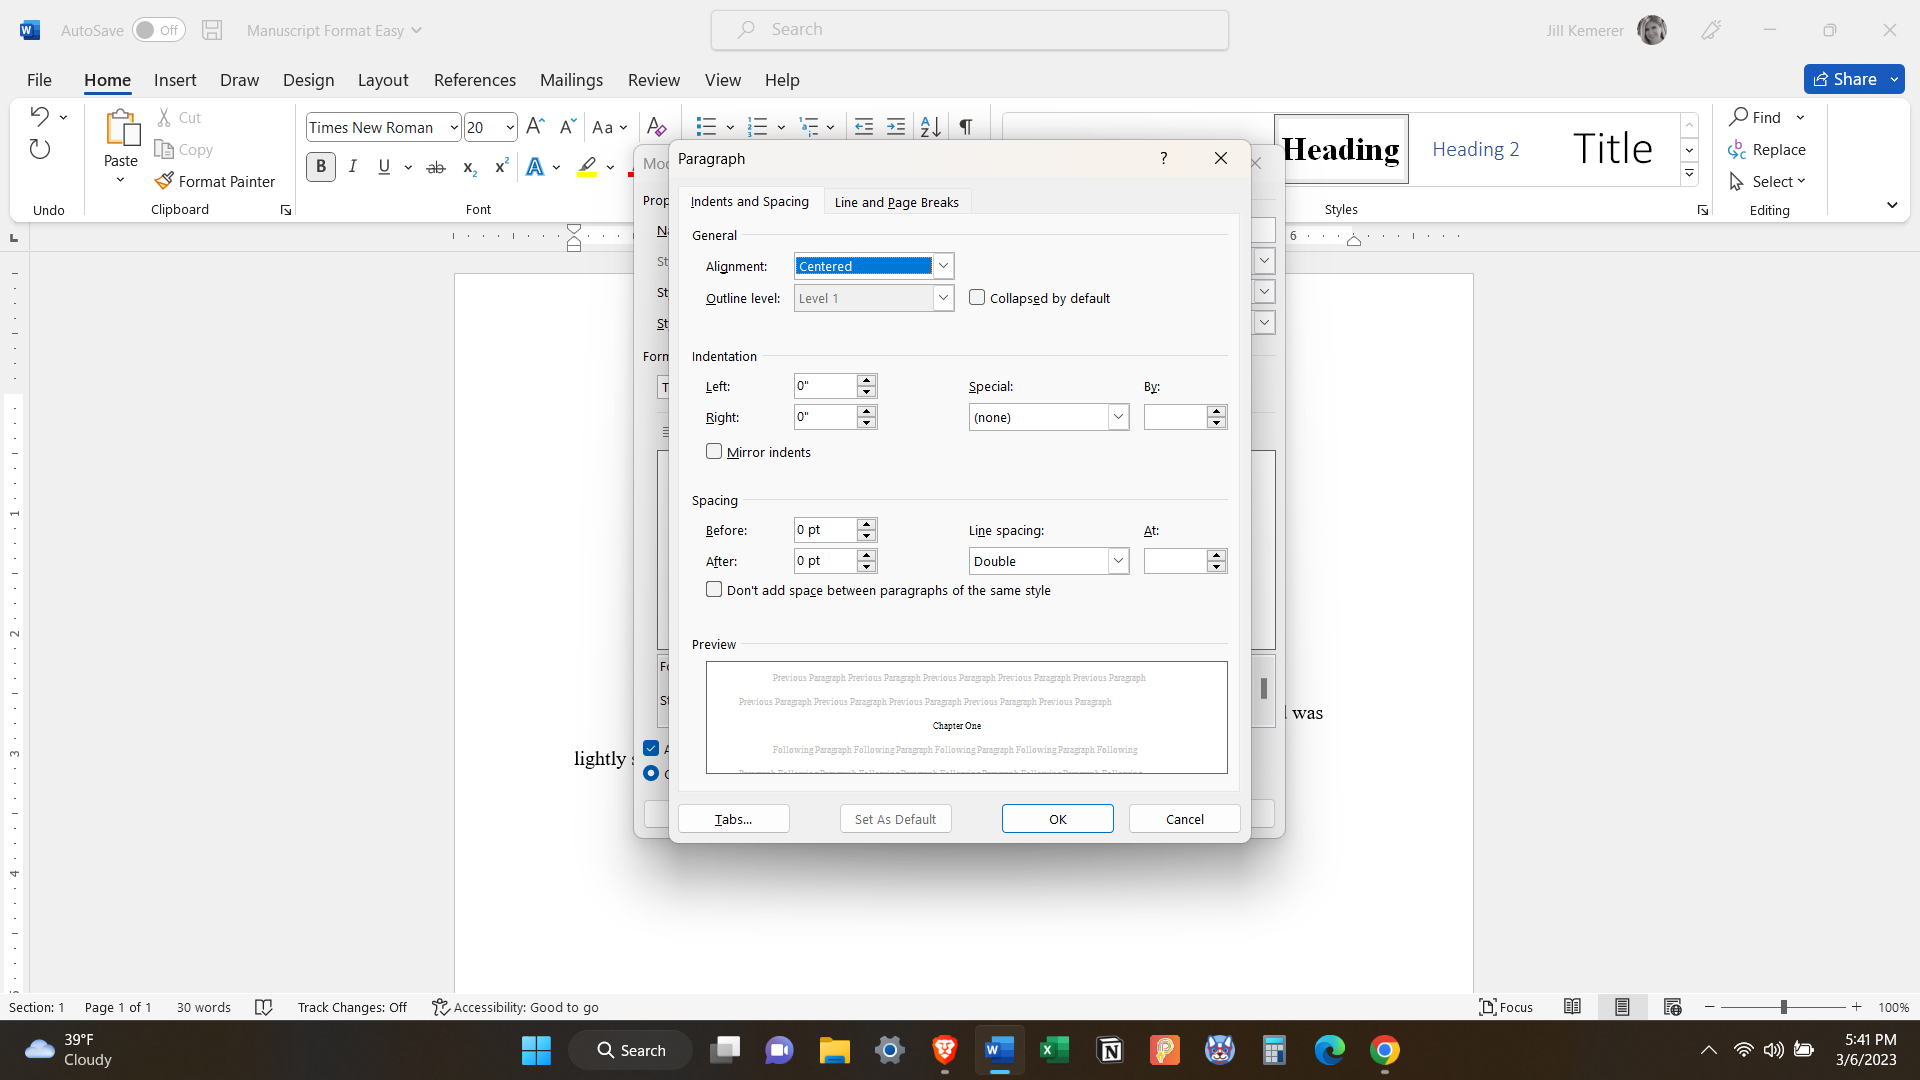
8. In the bottom left corner of the pop-up window, select the arrow next to Format and, once again, select Paragraph. Your new pop-up window will show different default settings from the Normal one you modified. The Indentation should already be set to 0″ for Left and Right. Next to it, change Special to (none) if it isn’t already. You don’t want your chapter headings to be offset by half an inch.
9. Under the Indentation section, you’ll see the Spacing section. Set both Before and After to 0 pt. Then set the Line Spacing to Double if it isn’t already.
It should look like this:
10. Click OK to exit out of the pop-up window and click OK again to exit out of the next one.
Your basic formatting styles–Normal and Heading 1–are now complete.
Every word you type will automatically be formatted with the Normal style unless you select a different style from the menu. Use the Heading 1 style for your new chapters. After you’ve typed your chapter title, press Enter and the style will automatically switch to Normal. Every time you hit enter, a new paragraph will begin and it will automatically tab by half an inch for you. The formatting is automatic. Who doesn’t love that?
If you start a new scene, simply insert an asterisk to denote a scene change. Keep the style set to Normal. When you end a chapter, insert a page break. There’s a simple shortcut to do this. Press the Control and Enter buttons on your keyboard simultaneously, and a scene break is added. Or you can go to the Insert tab next to the Home tab and select Page Break from there.
That’s it. Your manuscript format is done. Woohoo!
*If you need more styles (for instance, you use sub-headings), simply follow the above instructions to modify any styles on the toolbar.*
By the way, when my manuscript is formatted correctly from the very first word I type, it’s easier for me to stay focused. And, boy, do I need every bit of focus I can get!! Try my blog post “3 Ways to Avoid Distractions and Keep Writing” if you struggle with focus.
Any questions? I’m happy to help!
Thanks for stopping by!
Related Posts
Comments (0)